Monthly Archives: July 2012

Napoleon’s 1812 Russian Campaign to the Capture of Vitebsk on 28 July

This post follows on from previous ones describing Napoleon’s invasion of Russia in June 1812 and the reasons why he invaded.

Napoleon was aware that his invasion of Russia presented major supply problems, describing it as ‘the greatest and most difficult enterprise that I have ever attempted.’[1] He did not expect to have to advance far into Russia, believing that he could win a decisive victory near the frontier.

Napoleon reached Vilna on June 28. He had hoped to engage Tsar Alexander I and the First Army under General Prince Michael Barclay de Tolly, but they had retreated north-east towards Drissa. This increased the distance between the First Army and the Russian Second Army, commanded by General Prince Peter Bagration.

Napoleon attempted to trap and destroy Bagration’s army between the I Corps of Marshal Louis Davout and his right flank, commanded by his brother Jerome, King of Westphalia; the 45,000 Russians would be surrounded by 110,000 troops.[2]

On 4 July, Bagration learnt that Davout had crossed his line of retreat and moved south towards Minsk. Jerome,  hampered by supply problems, poor roads and heavy rain, moved slowly, and Bagration escaped. Jerome failed to keep his brother informed of his movements. Napoleon told him that:

If you had the most elementary grasp of soldiering, you would have been on the 3rd where you were on the 6th, and several events which would have resulted from my calculations would have given me a fine campaign.[3]

Napoleon blamed Jerome for the French failure to destroy Bagration’s army. Charles Esdaile says that this is now generally regarded as being unfair; Jerome was not a good general, but he was given an impossible task by his brother. The French faced great supply problems in a country where they could not rely in the local population. The army was too big and the distances too vast to allow Napoleon to control the battle and to carry out a battles of encirclement.[4] Adam Zamoyski blames Napoleon, who had appointed his brother, who had no military experience, to high command for political reasons.[5]

Napoleon put Jerome under the command of  Davout. Jerome was angered by his brother’s criticisms and got on poorly with Davout. He left the army and returned to Westphalia.

Napoleon ordered Davout to pursue Bagration and prevent the two Russian armies joining forces. Napoleon intended to destroy Barclay de Tolly’s army, which had reached Drissa on 11 July. Its fortifications were strong, so Napoleon decided to turn its flank, forcing the Russians to retreat and fight in the open.

On 12 July Alexander accepted that Drissa was a trap for his army, and that it should withdraw to Vitebsk. Adam Zamoyski points out that this decision, whilst militarily correct, created problems for Alexander. He had made a rousing speech the day before, promising his troops a victorious battle. The army had done nothing to fight the invader, and Alexander had given up a large proportion of his empire. The Tsar was persuaded by his advisers that his place was in his capital, rallying his people and recruiting more troops. He therefore left the army.[6]

On 19 July Napoleon received a report that the Russians had left Drissa. He expected the Russian armies to meet at Polotsk, and thus moved towards Kamen. Two days later he realised that their rendezvous was to be at Vitebsk. On 23 July Bagration and Davout fought a battle, called Mogilev by the French and Saltanovka by the Russians. Bagration was unable to break through and unite with Barclay.

Engagements took place between the French cavalry under Marshal Joachim Murat and Barclay’s troops at Ostrovno on 25 and 26 July. This convinced Napoleon that Barclay was willing to give battle, and he decided to wait until 28 July to bring up more troops, rather than attacking on 27 July with the troops available.

David Chandler considers this decision to be a major error by Napoleon. Barclay abandoned his original plan to fight at Vitebsk when he learnt that Bagration could not move to support him. The day’s delay allowed the Russians to withdraw towards Smolensk. There were enough good roads for him to be sure of getting there safely.[7]

Barclay, according to Adam Zamoyski, was correct to withdraw. A Russian victory would have been highly unlikely, and would not have been decisive; Barclay commanded the main Russian army but faced only part of Napoleon’s army. The failure to win a victory damaged French morale.[8]

The French took Vitebsk on 28 July. It had been the most easterly city of Poland until 1772,  when Austria, Prussia and Russia carried out the first of their three partitions of Poland. The French had taken all of Lithuania and had a defensible position. Napoleon initially claimed that:

Here I stop! Here I must look around me, rally, refresh my army and organise Poland. The campaign of 1812  is finished.[9]

Napoleon, however, soon changed his mind.  The country to the east was more fertile and the Russian armies were only about 100 miles away. On 12 August he marched on Smolensk, intending to inflict a decisive defeat on the Russians; see the next post in this series.


[1] Quoted in C. J. Esdaile, Napoleon’s Wars: An International History, 1803-1815 (London: Allen Lane, 2007), p. 462.

[2] D. Chandler, The Campaigns of Napoleon (London: Weidenfeld & Nicolson, 1966), pp. 775-76.

[3] Quoted in A. Zamoyski, 1812: Napoleon’s Fatal March on Moscow (London: HarperCollins, 2004), p. 176.

[4] Esdaile, Napoleon’s Wars, p. 468.

[5] Zamoyski, 1812, pp. 167-68.

[6] Ibid., pp. 171-72.

[7] Chandler, Campaigns, p. 779.

[8] Zamoyski, 1812, pp. 179-81.

[9] Quoted in Esdaile, Napoleon’s Wars, p. 470.

4 Comments

Filed under War History

The Battle of Garcia Hernandez, 1812

This action took place on 23 July 1812, the day after Wellington‘s Anglo-Portuguese army defeated Marmont‘s French at Salamanca.  A brigade of 770 heavy cavalry of the 1st and 2nd Dragoons of the King’s German Legion, commanded by General Georg Bock, supported by the 1,000 British light cavalry of General George Anson’s brigade encountered a French division of 4,000 infantry commanded by General Maximilian Foy.

The British monarch, King George III,  was also Elector of Hannover. A large part of the Hanoverian Army escaped to Britain when the French invaded their country in 1803 and formed the KGL, which was part of the British Army.

Foy’s division had not been engaged at Salamanca, and it was acting as the rearguard for the retreating French army. His cavalry fled as the KGL advanced, so he formed his infantry into squares.

A square was a square or rectangular formation, at this time normally formed by a single battalion. Infantry caught in line or column by cavalry would be massacred, but were generally safe in a square. The British, whose lines were two men deep, formed squares that were four deep. The French, whose lines were three deep, formed squares that were either three or six deep. Squares were usually hollow, but solid ones could be formed to rally troops in an emergency.

Horses would not attack the rows of bayonets offered by a square, so disciplined infantry in a square were safe from unsupported cavalry. Cavalry could defeat squares by bringing up their supporting horse artillery, which would destroy the squares by firepower. All artillery was pulled by horses. The gunners of horse artillery, which had light guns, rode on the horses or limbers, so could move faster than the heavier foot artillery, whose gunners marched.

Infantry caught in the wrong formation because of errors by commanders or because the attacking enemy was concealed by terrain or poor visibility could be massacred. This happened to British infantry that was caught in line by French and Polish cavalry coming out of the mist at Albuera in 1811. The day before at Salamanca General Maucanne observed British cavalry advancing and formed his division into squares, only to be surprised by British infantry that attacked over the crest of a ridge.

Garcia Hernandez was a small action, but it is famous because it was the only battle of the Napoleonic Wars involving the British Army in which a formed square, of either side, was broken exclusively by cavalry.

File:Garcia Hernandez.svg

Battle of Garcia Hernandez. Source: //upload.wikimedia.org/wikipedia/commons/e/e3/Garcia_Hernandez.svg

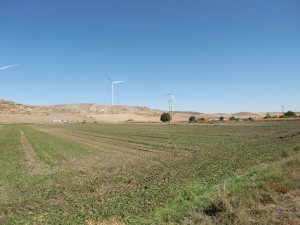
Battlefield of Garcia Hernandez today.

The KGL charged a square of the French 6th Light Infantry Regiment. It allowed the cavalry to get too close before firing, and a mortally wounded horse fell into the side of the square, creating enough of a gap for other cavalry toget inside the square. The square broke, with most of its members surrendering.

A second French square was shaken by this, and its men fled or surrendered when the German dragoons attacked it. Foy withdrew the rest of his division. According to Sir Charles Oman 200 Frenchmen were killed and 1,400 captured. The KGL lost 54 killed and 62 wounded. The reason for the high ratio of dead to wounded was the deadly effect of very short-range musket fire.[1]

The map in this post is from Wikipedia; link given in the caption. The photo was taken by myself when I visited the battlefields of Wellington’s campaigns of 1809-12 in a tour led by Ian Fletcher. I have no connection with Ian Fletcher Battlefield Tours except as a satisfied and repeat customer.


[1] C. Oman, Wellington’s Army, 1809-1814 (London: Edward Arnold, 1912), pp. 101-2.

2 Comments

Filed under War History

The Battle of Salamanca, 1812

Wellington‘s Anglo-Portuguese army captured the French held fortress of Badajoz in April 1812 and then moved north to deal with the threat offered by Marshal Auguste Marmont‘s French army to Ciudad Rodrigo, which Wellington had taken in January. Ciudad Rodrigo and Badajoz  covered the northern and southern routes respectively from Portugal to Spain. An army invading Spain from Portugal had to hold both in order to protect its lines of communication back to Portugal.

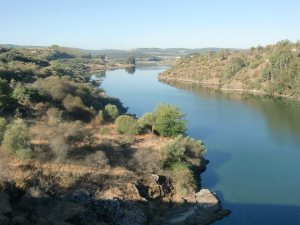
River Tagus from the repaired stone bridge towards the position of the French wooden pontoon bridge.

On 12 May 1812 three brigades under General Sir Rowland Hill attacked and destroyed the wooden pontoon bridge that the French had built across the River Tagus at Almaraz. It replaced a stone bridge that had been destroyed during the Talavera campaign in 1809. The loss of the Almaraz bridge greatly lengthened the lines of communication between Marmont’s army in northern Spain and Marshal Nicolas Soult‘s force in the south.

The French had significantly more troops than Wellington in Spain.  According to Jac Weller, he had just over 60,000 men whilst there were over 230,000 French soldiers in Spain. However, the French forces were divided into five armies; Marmont  had 52,000 troops and Soult 54,000.[1]

Wellington had sole command and his superior supply and intelligence systems, British control of the seas and the Spanish guerrillas meant that he could manoeuvre against  either Marmont or Soult. The latter could more easily evade and join up with other French forces, such as the 60,000 men under Marshal Louis Suchet that had just taken Valencia.

Charles Esdaile notes that the defeat of Soult would result in the liberation of Andalusia, but that this would have no impact on the north. Defeat of Marmont in the north would force the French to withdraw from Andalusia.[2]

Wellington therefore determined to attack Marmont. He did not have control over Spanish troops at this stage,, but his prestige gave him enough influence to persuade the Spanish to undertake operations aimed at tying down the rest of the French forces in Spain.

An Anglo-Portuguese division under Hill was sent south to help General Ballesteros’s army in the south. The threat of invasion of from Naples by from Lord William Bentinck’s British, Neapolitan and Spanish force kept French troops in Catalonia.

Wellington advanced  on Salamanca on 13 June with 48,000 men and 54 guns. Marmont withdrew behind the River Duero, leaving behind a small force, based in three fortified convents. Wellington entered the city on 17 June but took 10 days to subdue the garrison.

Wellington then advanced on the Duero, hoping that Marmont would attack him, and waiting for the Spanish 6th Army to arrive in the French rear.  The 6th did not appear, as its siege of Astorga took longer than expected.

Marmont had only 44,000 men, but Wellington’s inaction convinced him that he could afford the take the initiative despite being slightly outnumbered.  He crossed the Duero on 15 July and forced Wellington back towards Salamanca by trying to outflank him and thus threaten his lines of communication.

Map of the Battle of Salamanca, 22 July 1812. Source: http://en.wikipedia.org/wiki/File:Battle_of_Salamanca_map.jpg

On 22 July the Anglo-Portuguese army was positioned along a line of low hills, the southern end of which was a hill called the Lesser Arapile. Marmont seized the Greater Arapile, a larger hill a few hundred yards to its south, and attempted to move round Wellington’s left flank. Wellington saw what was happening and re-positioned his army to avoid this.

Marmont now made a mistake. He was convinced that Wellington was too cautious and mistook these movements for a preparation to retreat. Marmont therefore ordered his army to move westwards. Wellington, who had been considering an attack, observed the French becoming strung out threw away a chicken leg that he had been eating and ordered an attack, announcing ‘By God that will do.’[3]

Thomières’s division, leading the French advance, was attacked by Pakenham’s Third Division, which appeared over the crest of a ridge. The French fell back with heavy losses, and Pakenham then advanced on the next French division, that of Maucune. It had formed itself into squares because of the threat from a British cavalry brigade under General John Le Marchant, but had then been attacked by the infantry of  Leith’s Fifth Division, Well disciplined infantry in square were secure against cavalry but had no chance in a firefight with infantry in line.

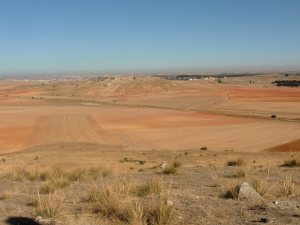
The Lesser Arapile from the Greater Arapile.

Le Marchant’s cavalry charged into Maucune’s troops as they retreated, and then attacked the third French division, commanded by Taupin. It was also routed. Three out of eight French divisions had now been destroyed.

Thomières and Le Marchant were amongst the dead, whilst Marmont and his second-in-command, General Bonnet, had both been wounded. There is some doubt over the timing of Marmont’s wound; he claimed that it was before Wellington counter-attacked, preventing him responding, whilst his enemies said that it was later.

An attack by Cole’s Fourth Division and Pack’s Portuguese Brigade on the Greater Arapile was repulsed. General Bertrand Clausel, now commanding the French army, thought that this came him an opportunity to counter-attack. Wellington saw the danger and had plenty of reserves, which he moved into position to cover the danger.

Esdaile says that the battle is ‘Known, and for good reason, as “Wellington’s Masterpiece”.’[4] He surprised Thomières and then destroyed Maucune and Brennier’s divisions with an attack in echelon. Wellington was able to mas superior numbers at the decisive point.

Weller argues that Clausel’s counter-attack in ‘conception was brilliant; it was flawlessly executed. Against any other contemporary commanders, excepting only Napoleon and Wellington, Clausel would probably have succeeded in making it a drawn battle.’[5]

The French casualties were 12,000, compared with 5,000 for the Anglo-Portuguese. the French also lost 12 guns and two eagles. Their losses might have been higher had the pursuit been more vigorous, but the pursuers lost cohesion in the night and were exhausted after days of marching and a battle on a very hot day. Some, including Weller, blame the Spanish General de España  for not garrisoning the bridge at Alba de Tormes, but Esdaile says that this had little effect.[6]

Casualties amongst senior officers were high in this battle. The deaths of Thomières and Le Marchant and the wounds suffered by Marmont and Bonnet have already been mentioned. On the French side, General Ferrey was also killed and Clausel was wounded, meaning that the three most senior French officers were wounded. The British General Lord William Beresford was badly wounded and Wellington was badly bruised by a bullet that struck his saddle holster.

The loss of Le Marchant was a particular blow to the British. He had improved the training and tactics of the British cavalry, which was prone to getting out of control when charging. The only British cavalry general of comparable skill was Henry Paget, then Lord Uxbridge and later Lord Anglesey; he had eloped with Wellington’s brother’s wife and the two consequently did not serve together until Waterloo in 1815.

The map in this post is from Wikipedia; link given in the caption. The two photos were taken by myself when I visited the battlefields of Wellington’s campaigns of 1809-12 in a tour led by Ian Fletcher. I have no connection with Ian Fletcher Battlefield Tours except as a satisfied and repeat customer.


[1] J. Weller, Wellington in the Peninsula 1808-1814, New ed. (London: Greenhill, 1992), p. 207.

[2] C. J. Esdaile, The Peninsular War: A New History (London: Allen Lane, 2002), p. 390.

[3] Quoted in Ibid., p. 395.

[4] Ibid., p. 397.

[5] Weller, Peninsula, p. 223.

[6] Esdaile, Peninsular War, p. 397; Weller, Peninsula, p. 225.

4 Comments

Filed under War History

The Attack on Pearl Harbor by Alan Zimm

The Attack on Pearl Harbor: Strategy, Combat, Myths and Deceptions (Haverton, PA/Newbury: Casemate, 2011) by Alan D. Zimm analyses the Japanese attack on Pearl Harbor on 7 December 1941 by use of operation research techniques.

Casemate, the publisher, say that the book asks:

Questions never before asked or answered on the Japanese attack from an operational and tactical perspective.
The attack on Pearl Harbor on 7 December, 1941, has been portrayed by historians as a dazzling success, “brilliantly conceived and meticulously planned”. With most historians concentrating on command errors and the story of participants’ experiences, this book presents a detailed evaluation of the Japanese attack on Pearl Harbor on an operational and tactical level.
It examines such questions as: Was the strategy underlying the attack sound? Were there flaws in planning or execution? How did Japanese military culture influence the planning? How risky was the attack? What did the Japanese expect to achieve, balanced against what they did achieve? What might have been the results if the attack had not benefited from the mistakes of the American commanders? The book also addresses the body of folklore about the attack, supporting or challenging many contentious issues such as the skill level of the Japanese aircrew, whether midget submarines torpedoed Oklahoma and Arizona, as has been recently claimed, whether the Japanese ever really considered launching a third wave attack, and what the consequences might have been.
In addition, the analysis has detected for the first time a body of deceptions that a prominent Japanese participant in the attack placed into the historical record, most likely to conceal his blunders and enhance his reputation. The centrepiece of the book is an analysis using modern Operations Research methods and computer simulations, as well as combat models developed between 1922 and 1946 at the U.S. Naval War College. The analysis puts a new light on the strategy and tactics employed by Yamamoto to open the Pacific War, and a dramatically different appraisal of the effectiveness of the attack on Pearl Harbor.

Zimm subjects the strategy behind the attack, the tactical plan and the actual attack to detailed analysis. He uses the assumptions made by the US Naval War College in its wargames and the outcome of other actions in the Pacific War to evaluate the likely outcomes of various options for both sides.

According to Zimm, Admiral Yamamoto Isoruku, commander of the Japanese Combined Fleet, wanted to sink at least one battleship as he believed that this would destroy the American will to fight. The battleships were therefore the main targets of the attack, but the carrier aviators who planned it regarded the aircraft carriers as the main threat, and allocated a significant number of aircraft against them.

The Japanese plan was inflexible. B5N Kate bombers that could carry either bombs or torpedoes were allocated to one or the other early on in the planning, and their crews were then trained for only one role, making future changes to the bomb/torpedo mix impossible.

The absence of the carriers from Pearl Harbor was known the day before, but no changes were made in the plan, resulting in a large number of torpedoes being wasted on the target ship USS Utah, an unarmed former battleship. Some authors have claimed that the Japanese mistook her for a carrier because her gun turrets had been removed, but Zimm quotes Japanese reports to show that she was attacked in the belief that she was an active battleship.

The attack was unco-ordinated. The bombs of the D3A Val dive bombers could not penetrate battleship armour. They should either have attacked the battleships in the first wave along with the torpedo bombers in order to suppress their AA fire or else bombed cruisers, which they could sink. Instead, the Vals of the second wave wasted many of their bombs on battleships that they could not sink.

The Kate level bombers, which destroyed the USS Arizona, and the attacks on airfields exceeded expectations. However, more ships would have been sunk if more Kates had carried torpedoes, and sinking cruisers was a better use of the Vals’ bombs than destroying aircraft. The Japanese aircrew were badly let down by a large number of dud bombs.

Yamamoto was willing to attack even without the benefit of surprise. Zimm convincingly shows that this would have resulted in very heavy Japanese casualties and much lower American ones.

Zimm characterises Yamamoto as a gambler, who was willing to take big risks. He included midget submarines in the attack. They achieved nothing and risked alerting the Americans. Zimm shows why the theory that a midget submarine torpedoed the Arizona is highly unlikely to be true.

The Americans ought to have had a warning system that would have given them 40 minutes’ warning. Ships would then have had their watertight doors and hatches closed and their AA guns manned, whilst the fighters would have been scrambled. Zimm therefore disagrees with those who try to exonerate General Walter Short and Admiral Husband Kimmel, the US Army and USN commanders.

The attack was a success. The target was to put at least four battleships out of action for a minimum of six months. Yamamoto wanted to destroy at least one battleship, and the Arizona and Oklahoma were lost permanently, but this did not have the psychological effect that he expected. The Nevada was out of service for over six months, and the California and West Virginia did not return to service until 1944, although this delay was partly because they were heavily modernised as well as being repaired. More US aircraft were destroyed than anticipated.

Zimm’s points are that huge risks were taken to achieve this and that a better plan could have inflicted even heavier casualties.

Zimm refutes three well known claims about the battle, which I had accepted until reading his book. The first is that the Japanese should have launched a third strike against shore facilities, including oil tanks. The Navy Yard  was too big to be seriously damaged by the force available. The oil tanks could have been destroyed, but they would have been repaired, and short-term supply shortages could have been met by a re-allocation of Allied tankers. Zimm points out that the Japanese paid little attention to logistics in their planning, so why would they consider disrupting enemy logistics?

He argues that the assertion that there was a heated discussion on whether or not to launch a third strike onboard the Japanese flagship Akagi is a fabrication of Commander Fuchida Mitsuo, the attack leader. Fuchida comes out poorly from this book. Previous research, including this paper by Jonathan Parshall, has doubted his account of the Battle of Midway and his claim to have present at the Japanese surrender in 1945.

The second claim is that it would have been better for the Japanese to meet the Americans at sea. Two of the four battleships that were sunk in the shallow waters of Pearl Harbor were subsequently raised and repaired. They would have been lost if they had suffered the same damage at sea.

Zimm points out that the Japanese would not have scored as many hits on ships that were free to manoeuvre at sea and had their AA guns fully manned. The hits would not have been as devastating on ships that had all their watertight doors and hatches closed.

Comparisons with the sinking of Force Z a couple of days later are invalid. The US ships had better AA systems than the British ones, the US force was larger and the British were attacked by more torpedo bombers than were at Pearl Harbor. At sea, the Japanese could have expected to sink only one US battleship, and then only if they had concentrated their attack on a single ship.

The final claim is that the Japanese aviators were exceptionally well trained and mostly combat veterans. In fact, two of the carriers, Shokaku and Zuikaku, were newly completed, and many of their aircrews were just out of training. Not many of the men on the other four carriers were combat veterans, as carrier aircrews had played relatively little part in the Sino-Japanese War.

The book includes an appendix in which Zimm imagines how the Japanese could have carried out a better attack. More torpedo bombers, better co-ordination and superior target selection result in higher US losses. There is no attempt to extrapolate this into a Japanese victory in the war. It is not one of the counter-factuals, popular on the internet, where one change in weapons production or tactics results in an Axis victory in the Battle of Britain/Stalingrad/Midway and thus the war.

This is an excellent military analysis. It is not a book for everyone. It is not one for anybody who does not know much about the battle or the causes of the Pacific War. It will not appeal to those who dislike acronyms, tables or lots of numbers. There are a number of extracts from memoirs, but these are intended to emphasis points in the analysis, rather than trying to show what it was like to be there.

For those who have some knowledge of the battle, but want a deeper analysis, it is highly recommended.

I read a Kindle copy. The text and quotations were clear, but I would advise e-book readers to switch to landscape format when studying the many maps and tables, which are too small to be legible in portrait format.

Leave a comment

Filed under Reviews, War History